How I Root Fig Cuttings Indoors—The Ultimate Guide

Inflorescence

Well-known member
Fig cuttings can be very easy to root. As such, there are many successful ways to root fig cuttings, there is no one way. I have successfully rooted hundreds of cuttings using this method and this is my preferred way to root indoors in my dry climate. I find it very simple and low maintenance. I’m sharing this for those it may help. Use the method you prefer.

It should at the least help to start form the pattern for you for how fig cuttings can work. Your own experience and the other things you will read from others will help to fill in the rest.

Happy Growing! 🌱


HOW TO USE THIS GUIDE:
There are two “Contents” sections, both utilize hyperlinks to take you to the topic you want by clicking on the words.

Scrolling in the thread should display a green square box with an up arrow at the bottom right which will take you directly back to this OP.

Pictures are sized as thumbnails to avoid cluttering the thread. But please click on the picture to see a larger & clearer picture when desired.


MAIN CONTENTS
 
Last edited:
Treepot Pops (Bagged Direct Plant Method) IMG_2797.jpeg

SHORT VERSION:

Stick prepared cutting in a pot with moistened rooting mix, and bag the pot until rooted. Keep in an ambiently warm area, preferably in the 70-80°F range.
That’s it!


SUPPLIES NEEDED:

  • Oil based paint pen
  • Pruning shears
  • Semigloss interior paint. (I use a sample can, but any old paint laying around works, semigloss or gloss is preferred over satin or flat to repel water.)
  • Rooting mix:
    • 60/40 Coco coir & perlite, or
    • 50/50 Peat & perlite, or
    • Equal parts peat, pumice/ perlite, & coarse vermiculite for a grittier mix.
  • 4 x 9 Treepots, or equivalent
  • Plastic bags or produce bags from grocery store
  • Tray to set pots in and for bottom watering
  • Fertilizer: water soluble fertilizer with complete macro and micro nutrients; worm casting tea, or seaweed fertilizer. (I limit organics at this stage for indoor growing; do not use fish emulsion.)

FULL DETAILS AND INSTRUCTIONS:
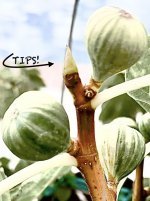
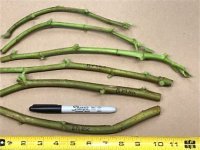
1. Trim tops and bottoms of cuttings, unless an apical bud cutting, then just trim the bottom.
Try to leave a minimum of 1/4” above and below nodes. I usually leave up to 1/2” on the bottom, the top can be a little longer if desired.

2. Cut to the desired length and node count. I prefer 4-5” long cuttings. Short or single node cuttings can also root well.

3. Write the name of the variety onto the cutting using an oil based paint pen. Let the paint dry, usually takes less than an hour.

4. Soak cuttings in room temperature water overnight or 4-8 hours. A longer soak could be necessary for drier cuttings or ones that were stored a long time.

5. Take cuttings out of water and let the tops dry off. You can place a damp towel over the lower half if they appear to be drying out too much. I usually wait a couple hours before the next step.

6. Seal dry cut tops with semi-gloss interior paint. Let the paint dry. (Other things can be used instead of paint such as wood glue, grafting/pruning sealer, or wax.) I often leave the cuttings in a glass with a little water at the bottom while the paint dries and until I pot them to keep them hydrated.

7. Label your pots with your paint pen to match your cuttings. Add your source & the date if you like so you can track your rooting time. Alternatively, write it on a label to stick in or on your pot. Painter’s tape can also be used as a temporary pot label, just be aware that moisture can affect it.

8. Fill treepots to the top with the rooting mixture. Keep it light and fluffy, do not push it down into the pot.

9. Water the rooting mix in the pot with a hose using a rain wand until run off. Do this a few times if your mix started dry. (Don’t use water straight from the hose, because it will come out in a gush and will push down the rooting mix compacting it more than we want.) Top off your pots with more rooting mix if needed & water again. Let drain.

**Alternative: If you prefer to not use a hose, you can pre-moisten your mix before filling your pots. A good starting reference is about 5 parts mix to 1 part water. Start with less water, you can always add more as needed. Moisten it just to the point of it holding & clumping together when squeezed in your hand. Water should not squeeze out of it other than a few minor drips. Make sure to fluff it up to reaerate it, lightly add it to the pot to keep it fluffy and to not compact it in.

10. Using a tool, make a hole in the rooting mix for your cutting. Keep the bottom of the hole at least 2-3” or higher from the bottom of the pot. Note that I make a hole larger than I need to fit the cutting. Do not push your cutting into the rooting mix instead of making a hole!

11. Put the cutting into the hole you made, leave just one node out, and squish the mix at the top around the cutting to hold it in place. Note that I only squish the very top just around the cutting itself and I do not press the mix around the entire length of the cutting or all over the top. We want to keep our rooting mix fluffy and aerated in the pot and do not want to compact it down.

12. Thoroughly water in the cutting with the rain wand to run off*. Let drain completely. (I wait about 30 minutes or so, until the pot stops dripping from the bottom, before going to the next step.)
*You can skip this step if you pre-moistened your mix before putting it in the pot.

13. A. FOR A SINGLE POT AND CUTTING:
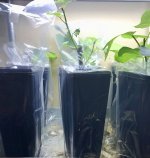
Place the prepared pot into a plastic produce bag. Tie the bag around the top of the cutting or use a rubber band to close the bag around the top of the cutting. I try to leave a little gap between the cutting and the bag. (You may need to leave out more than one node to have enough room to tie the bag with this method. Make sure your rooting mix is high enough in the pot.)

B. FOR A BULK AMOUNT OF CUTTINGS:
Use a large white kitchen trash bag with drawstrings to place multiple pots inside. Place the bag in your tray (or your tray in your bag depending on size) and set the prepared pots inside. Close the bag at the top with the drawstrings. It should not close tight but should leave about a 1-2” hole or larger at the top for air circulation. You will use this hole to control the humidity. Make sure the bag is not resting on the cuttings, but puff it out away from them.

14. Leave the cuttings alone for about 4-6 weeks in a warm room, 72-78°F is ideal. If you see signs of growth, you can open the plastic bags to allow room for growing stems if needed. Any not showing signs of growth should remain bagged & tied.

15. After about 4-6 weeks, the rooting mix will need some water added.
Don’t let the rooting mix dry out completely at any point. Start adding water to the pots after the initial 4 weeks. Feel the pot to check the weight first before adding any water, it should be noticeably lighter than when it was first bagged.

Just a little is needed in the beginning, about 1/8-1/4 cup around the edge of the pot. There should not be much run off in the bottom of the bag, a tiny bit is okay, but drain it out if there is a larger quantity. You don’t want your pot to sit in water in the bag.

Rebag the pot if there are little to no signs of growth and wait another couple of weeks. If you see significant growth has started, you will want to check for water about once a week from here on out. You can start pulling down the bag or remove it completely depending on the amount of growth.

The bag is used to maintain consistent moisture to initiate rooting, so do not remove the bag completely until you are sure it has rooted.

16. I use LED shop lights as grow lights and I turn them on once I see leaf growth. I leave them on about 12-14 hours a day.

17. Once they start leafing out well and it is clear the cutting has roots, I remove the plastic bags completely and start bottom watering in my tray. I also start regular weak fertilization at this point about every other watering. You can use worm casting tea, seaweed extract, or a conventional chemical fertilizer at half of the houseplant dose. EM 1, LABS, fermented willow bark extract, or aloe vera can also be used to a limited degree diluted.
 
Last edited:
GENERAL TIPS

▪️Buy a few trees so that you are not over eager with your rooting cuttings and can try some figs the coming season. This will help with patience, which is essential for growing anything well. 🙂

▪️ I do not use and I strongly do not recommend rooting hormone. It seems to encourage rot and it seems to encourage accelerated growth that then dies out before the cutting can take and stabilize. Fig cuttings root really well on their own and do not usually require hormone. I would only try it as a last resort on varieties that have been stubborn to root for you. Only use liquid/watery ones, do not use powder or gel types which commonly cause rot.

▪️I do not use and strongly do not recommend heat mats if they can be avoided. Heat mats are notorious for overheating which can kill tender, new roots or the bottom portion of your cutting. They also can dry out your rooting mix from the bottom up, which means you are unable to know that the inside of your pot is dry because the top still appears moist. Condensation from the heat is not necessarily an indication that your rooting mix is still damp, but is an indication that moisture has left it.

The heat can also encourage the breakdown of material and bacterial development in wet rooting mixes which then causes your cutting to rot. I would only recommend the use of a heat mat if ambient room temperatures cannot be kept at 70°F or above. However, I personally use a portable room heater near my cuttings instead. 72-78°F is ideal for rooting. Higher temps can encourage bacterial growth & rotting, lower temps stall growth and development, which can lead to rotting if too young & not hardened yet.

▪️There is no one rooting method that can guarantee 100% success. There are many factors that affect success rate, so someone else’s success rate should not be the determining factor for what you choose. The amount & variety of cuttings someone has rooted, cutting quality, environment, rooting mix, up-potting, individual behaviors not spelled out all have a bearing on success rates. So experiment and see which rooting method works best for you with your own individual circumstances.


Examples to illustrate the point:
1)A person can take 100 cuttings from their neighbor’s tree, very fresh, not dormant, an easy to root variety, use a certain rooting method, and have a 100% success rate.
Another person can buy 100 cuttings that vary in quality and are different varieties, use the exact same rooting method as the person above, but only have a 50% success rate.
It wasn’t the rooting method that affected success, it was the cutting quality & variety that affected results.
2) A person can take 100 cuttings from their neighbor’s tree, very fresh, not dormant, an easy to root variety, use very poor rooting technique, and still end up with a 70% or greater success rate. Fig cuttings are easy to root and resilient, because of their good quality they rooted in spite of the poor technique.
Another person can buy 100 cuttings that are poor quality or hard to root varieties, use a perfect rooting technique, but only end up with about 30% successfully rooting. It was their technique that actually salvaged the situation because of the poor cutting quality. This is the one you should emulate, but the success rate number detracts from that.
3)A person lives in a humid environment and roots outside in their warm, humid greenhouse. They just stick the bottom tip of a cutting in their homemade compost laden potting mix, and voilà, they have a rooted cutting. They rely on pesticide to control fungus gnats and other pests, plus the occasional breeze helps, but they don’t like to talk about that since they like to appear organic, so don’t mention it, kind of forgets they used it anyhow. Rooted 1 cutting, has a 100% success rate.
A person in a cold, dry climate hears this success rate and tries to duplicate this person’s method. They do not have a greenhouse, and their house is 65° where they want to root. They are advised that they do not need anything to seal their cutting because the other person didn’t need it and that a heat mat will work great to compensate for the cooler weather. They attempt to root 20 cuttings and have a 10% success rate, a house full of fungus gnats, and a bunch of rotted cuttings. They actually did better than the person above because they have two rooted cuttings vs. the one, but the method did not translate well because of the vastly different environment.
LESSON: Success rate, while an indicator of something, can mean very little depending on the parameters involved. It’s interesting, but take it with a grain of salt. Also, people exaggerate.
 
Last edited:
ACCLIMATING & UP-POTTING TIPS

▪️I take my rooted cuttings outside once low temps are consistently over 40-45° and any danger of frost has passed. I use my outside trees as a marker as well, if they are waking up and leafing out, it’s usually a good sign weather has become conducive to growing.

Usually, spring sunlight is not as intense, and I place them in filtered light or part shade without much need for acclimation when done early. The hotter and more intense the sunlight, the better to place them in shade first and gradually increase sunlight exposure. Watch your weather, the time of day, & watch how they do in the first hour. If they show signs of wilting, keep them in the shade or bring them back indoors.

(I generally do not give full sunlight exposure until I have them in 5 gallons, as sunlight here can be too intense for the smaller rooting systems. Frequent watering can help to compensate for that, but I just find it easier to wait for the larger pot so that I’m not constantly watering or having to move them back & forth.)

▪️I wait until the cutting is nearly rootbound before the first up-pot. You do not want to up-pot before then for the first time and it is not something I rush. Check to see if roots are poking out the bottom of the pot, or very gently, slightly push the plant from the bottom up to elevate it out of the pot a bit and check root growth. Do not completely remove it from the pot before checking for sufficient root growth to ensure the root mass & rooting mix will hold together and not fall apart if removed.IMG_2109.jpeg


A rooted cutting can be kept in a tree pot for years if needed, though not recommended if you actually want to try the figs at some point.

I up-pot from 4x9 treepots directly into 5-7 gallons using my regular potting mix. If I have extras or backups of a variety, I generally keep them indefinitely in treepots, or I up-pot to 3 gallons.
 
Last edited:
CUTTING TIPS

▪️ Mother tree health and cutting quality can significantly impact your success at rooting. Things like method used to clean cuttings, storage, weather conditions the cutting was subjected to, etc. can all affect if a cutting will root or not. Usually, the fresher the cutting, the better the success. That said, fig cuttings are very easy to root generally and so even a poorer quality cutting can root just fine in the end. Don’t despair & don’t stress over this aspect, but be choosy with your sources. Keep in mind that you are dealing with natural materials and so cuttings can vary in quality even with the best of sellers.

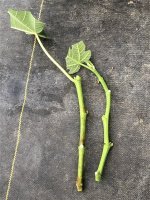
▪️ If you need to store your cuttings for a while before rooting, make sure to buy dormant & lignified cuttings. Non-dormant and semi-lignified cuttings are okay if you can root them right away, do not store these. Non-dormant cuttings root the best as they are fully hydrated & activated for growth. Green, unlignified cuttings are the most challenging to root, but can be successful for some. These need to be rooted immediately. Managing humidity is most important with green cuttings.

*Note that even lignified cuttings can have a greenish underneath color, especially when wet, this is not what we are referring to when we say “green” cuttings. A green cutting refers to new growth that has not fully hardened yet and is bright green all over, with little to no brown hazing at all. They are very tender and can even be floppy or wilty at the tips when removed from the tree.

Green Cutting Examples

IMG_2112.jpegIMG_2111.jpegIMG_2110.jpeg

▪️ Apical bud cuttings can be more stubborn to root, as the hormones for root growth are often lower down in the branch. Cuttings where the current season’s wood (1 year old wood) joins last season’s wood (2 year old wood) has the greatest potential for root development. The base of the stem at this junction contains a large number of dormant buds that supply hormones required for developing roots. However, most growers will take cuttings from upper current season wood for the sake of their own tree and growing preferences. This is to be expected, and the majority will root.

▪️ Make sure your cuttings are not shipped in the heat of summer because they can die, especially if they sit in a hot mailbox. Only cuttings taken late fall or winter are usually dormant, depending on where they are coming from.

▪️ I typically do not clean my cuttings before rooting them and do not recommend it. Some have killed cuttings by using water that is too hot in their cleaning process. You can put micro scratches into your cuttings depending on what you use to clean, this can cause tissue death in those areas which can bring on rotting. Microbial balance is very important in keeping things healthy, so I prefer not to remove nature’s microbes on healthy cuttings in order to not let other microbes take over.

I did not find sanitizing cuttings to decrease rotting issues in comparison to not sanitizing them. So to me, it is a wasted step that invites a need for future interventions.

The only time I clean a cutting is if there is something suspect on it, if it is clearly dirty, or if it has some mold on it. I only use cool water, a wet paper towel to wipe with, and diluted hydrogen peroxide or colloidal silver if necessary. Soap can affect pH and outer protective barriers, so I try not to use it.

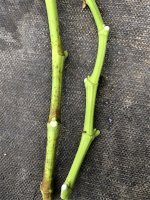
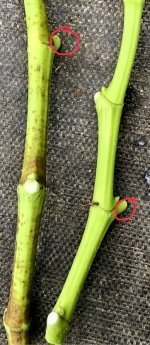
▪️ Be mindful of leaf and fig stem remnants left on cuttings. This happens when the leaves and fruit did not fall off on their own, but were pulled off. They can leave a little piece behind that will eventually fall off. You do not want to store or wrap cuttings with these left on because they can cause rotting in those areas.

Stem Remnants Circled

IMG_2110.jpegIMG_1135.jpeg


▪️ Hydration is one of the most overlooked aspects of rooting success. Hydrated cuttings root faster, which is one reason why non-dormant cuttings can be more successful at rooting. Because they have sap flow, they are hydrated.

Cuttings drying out is one cause of rooting failure, both in the rooting mix and the top part of the cutting exposed to air. Rooting mix should remain damp, but not wet. Burying the majority of the cutting helps to keep it hydrated. Using lower pH mediums like peat and coco coir, without organic matter added in, can help to prevent any mold formation on the buried part of the cutting.

Any part not buried and exposed to air should have something to help keep it from drying out & molding. This can be with a permeable grafting tape, wax, glue, pruning sealer, paint, a plastic bag or cup placed over the top, or something else used to control humidity. If you are in a humid environment, this naturally helps to prevent dry out, and something like grafting tape may be undesirable by keeping in too much moisture. However, this can be essential in a drier climate to have success.

▪️ If using candle wax or other hard wax to seal your cuttings, melt it and cool it to below 140°F to prevent damage to your cutting. Cheese wax is another type that can be used. Apparently, toilet bowl seal wax can also be used, which remains soft in a closed container, but I have not tried this personally myself yet. Apply it with a small brush or with a gloved finger. It can be messy but is reportedly successful.

▪️ Pre-soaking cuttings helps to rehydrate them and to activate all of the layers in the cutting for rooting. It can help to speed up vascular flow and the formation of rooting initials. This is a very helpful step for dormant cuttings and any that have been stored.

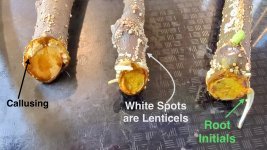
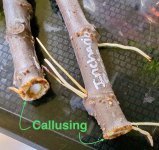
▪️ You can pre-root cuttings by leaving the bottoms in water, by putting the entire cutting in a plastic ziploc bag with a damp paper towel, or by putting in a bin fully covered by a lower pH inert medium such as damp but fluffy 100% coco coir or sphagnum peat moss, some prefer long fiber moss for this. This is done until lenticel development or roots start to form and can help with callusing and hardening of the cutting. Just note that these root intials are very tender and can be easily pulled off, so you need to be very gentle when placing them in rooting mix.

Some swear by pre-rooting, others hate it. I use pre-rooting when I intend to root soon, but don’t have time to fully process my cuttings for rooting right away and don’t want to store them in the fridge. This can hold cuttings for about a month give or take. Make sure to gently remove any fibers sticking to the cuttings before potting them.

Pre-Rooting Examples:
IMG_0151.jpegIMG_0153.jpegIMG_0155.jpeg


▪️ I do not score my cuttings. When I tried it, I did not find it to increase success. Scoring is recommended for difficult to root hardwood cuttings. The “wounding” should only be done enough to expose the light green cambium layer under the bark and not deeper than that. This can help to remove a physical barrier that may be in the way of roots forming. However, fig cuttings are not generally considered difficult to root, so this can be an unnecessary step that creates a vulnerable area. Some really swear by this though, so follow your own instincts. It may be more useful on older wood cuttings.

▪️ I have tried so-called natural rooting hormones: aloe vera, seaweed extract, fermented willow bark extract, saliva, honey, sugar, cinnamon, etc. I did not notice any difference in rooting with these and so I don’t bother with them anymore. But hey, I recommend experimenting and it certainly doesn’t hurt to try them yourself!
 
Last edited:
FERTILIZING TIPS

▪️ Early fertilization and nutrition is typically recommended to help a rooting cutting become established & hardened faster.

▪️ I am careful about using organic fertilizers indoors because they are meant to increase microbial activity. By the nature of them, they are natural materials meant to feed soil microbes. Nutrients are released into the soil as microbes break them down. This is a great thing for soil health in outdoor circumstances. It may not be the most desirable thing when indoors and trying to keep any pest pressure down or when you have an inert rooting medium not ready to breakdown natural materials.

Sometimes the organic fertilizers can gunk up your rooting medium which then needs to be broken down and processed. Nature does this through decomposition, anaerobic bacteria and molds start building, and this can negatively impact the cutting sitting in that. This can also lead to unpleasant odors building up in the house.

That said, I am a big proponent of organic growing and soil health. I do like to lay a good foundation for my trees to grow as naturally as possible. Using chemical fertilizers can be like giving your trees steroids, the growth isn’t as healthy as it appears, it can create dependency, increases pest pressure as chemical nitrogen can attract pests, and they can kill good microbes in the soil. There are other reasons as well to avoid chemical fertilizers.

I will use organic fertilizers and ferments no question for outdoor rooting plants. I am more choosy for what I will use indoors. Generally, I have found that worm casting tea, seaweed extract, and aloe can be used fairly well as long as they are properly diluted. EM 1, LABS, and certain other gentle ferments can be used from time to time as needed, but I don’t like to use them with frequency indoors. Any tea or ferments should be well strained with something like muslin to ensure no insect eggs are present. I do not use any compost or manures indoors ever, not even for tea.

▪️ A quick infusion can be made with worm castings by taking a small handful and putting it in muslin, a fine cheesecloth, or a nut milk bag and dunking it in your water a few times until it becomes cloudy. Use this infused water for watering. The same bundle can be used a few times in a row to infuse subsequent containers of water. Don’t let it sit in the water. This is just a few quick dunks and perhaps a little gentle kneading like a tea bag.

This can also be done with leaf mold soil if you are into JADAM and have some quality soil handy.

▪️ Indoor rooting is the only time I consider using chemical fertilizer. AscPete recommends a dilute nutrient / fertilizer solution of 1/2 tsp Miracle-Gro All Purpose to 1 gallon of water with 1/4 tsp Epsom Salt, to start. Gradually increase the MG as the plant grows up to no more than 2 tsp / gallon of water. I’m including this as an option for those who do not wish to use organic matter at this time.

Any water soluble fertilizer with complete macro and micro nutrients can be used as well. Just be sure to follow the houseplant dosage, starting at 1/4 to 1/2 the dose.

▪️ Foliar feeding can also be done, but it can bring on rust when used indoors if applied too frequently.

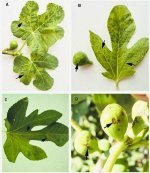
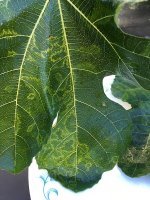
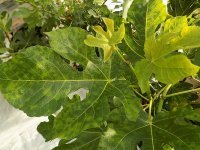
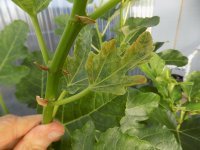
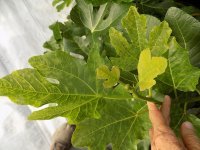
▪️ It is not uncommon to see signs resembling FMV infection in a newly rooted cutting and is not something to fear. It is most often a nutritional issue, sometimes varietal if it is a “weak” variety.


Nutritional Deficiency In Upper Leaves, Not FMV
IMG_2101.jpeg


This is because the newly rooted cutting has not regulated its ability to handle nutrients yet which can cause mottling and misshapen leaves. It also has limited stores of nutrition based on what was left in the mother tree at the time the cutting was taken, which can be low if dormant, and the rooting medium itself is not nutrient rich. Regular feeding can help alleviate any symptoms similar to FMV infection as the plant grows out of it as it becomes more regulated & stronger.

FMV— Deformed Leaves, Transparency, Mottling w/ jagged edges—Can Be Remedied w/ Nutrition
IMG_2117.jpegIMG_2119.jpegIMG_2122.jpegIMG_2120.jpeg
 
Last edited:
LIGHTING TIPS

▪️ I am not a lighting expert, so can’t help as much in this aspect. But I know that LED shop lights work great for indoor rooting. 5000k is good for warmth and the more lumens, the better. Keep the lights close to your plants, but leave room for the growth that will happen.

▪️ Do not rely on window lighting for your cuttings— it typically is not sufficient and is likely to cause leggy growth. Windows, unless very well insulated, also can have too much temperature fluctuation and are not good for the rooting period. So it is not recommended to place your rooting cuttings on the window sill. Sunlight through a window has fried plants and nighttime coldness can stall a cutting & prevent successful rooting. It’s a case of knowing your house.

▪️ 98% of cuttings will leaf out before they root. This is not a bad thing. The leaves can become a source of energy for the cutting. And one type of growth stimulates the other type of growth.

▪️ I do not worry about keeping my unrooted cuttings in darkness. I have not found that to improve success rates, in fact, I found the opposite to be true.
 
Last edited:
PEST TIPS

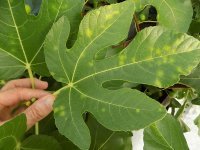
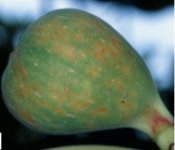
▪️ Fig mites can be a cause of round mottling spots on leaves that can resemble FMD or nutrient deficiency. These are typically more of a cosmetic issue than anything in my opinion. The main concern with them is that they are reported to transmit FMV from one plant to another, however, I have different feelings on the impact of FMV and so do not feel them to be any major threat.

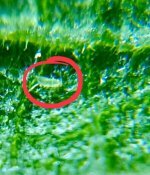
Injury from fig mite sucking can cause bronzing or russeting, and circular chlorosis type spots on leaves. They can be seen with a minimum magnification of a 20X hand lens to verify their presence. Once the cutting seems fairly rooted & growing, mites can be treated with sulfur, neem oil, or other treatments if desired. Be careful of light exposure after treatment. Sulfur and neem oil should not be used together, and at least two weeks should pass before using the other. Be careful to use a weaker concentration on new plants as the treatment can cause burning on baby plants, another reason why I usually wait.

I only treat if the damage seems severe & isn’t going away on its own. Generally, the healthier the plant, the less insect issue. It’s very interesting to look into Dr. Thomas Dykstra and his research on brix being an indicator in plants for certain types of insect issues. So, I try to boost health over resorting to pesticides, even natural ones, when possible.
Fig Mites, Note the rusting & circular spots

IMG_2113.jpegIMG_2114.jpeg IMG_2115.jpegIMG_2116.jpegIMG_2121.jpeg IMG_2123.jpegIMG_2124.jpeg

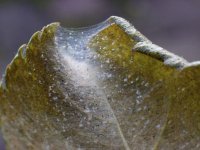
▪️ Spider mites can cause a sticky web formation on leaves, brown streaking, and eventually the leaves die & fall off. They also will spread to other trees so it is best to take care of them right away so as not to stall growth. I treat with neem oil or enzymatic soaps, such as Tweetmint. Avoid light exposure after spraying for 12 hours give or take. They are generally not an issue once outdoors.
Insert pic of spider mites
Spider Mites
IMG_2125.jpeg

▪️ Fungus gnatsSee below section linked here for prevention. It is best to take care of the problem when small because they can quickly overtake your rooting setup. Mosquito bits, Gnatrol, or neem meal water have been effective treatments. Generally not an issue once outdoors.

▪️ Ants will sometimes want to infest pots lower to the floor if you have an ant issue. I use Terro borax baits on a plant stake with good effectiveness for this. Diatomaceous earth powder can also be used as a physical barrier.
 
Last edited:
POTS & CONTAINERS TIPS

▪️ I do not recommend rooting in cups. It can be done, but often has problems at the up-potting stage because they frequently require up-potting before the cutting has stabilized. They also are short and so limit how much of the cutting you can bury. The more nodes you have buried, the more area you have for roots to develop, which can lead to a stronger plant.

I recommend quart deli containers, 2 liter soda/water bottles, or 1 gallon nursery containers over cups if treepots are not available. Be sure to make an adequate amount of drainage holes in the bottom before using. Soldering irons can be great for this or carefully heating a large nail grasped by pliers can work as well. A drill bit can also be used, and can go through several stacked together at once, but these also can cause the containers to split if not careful.

▪️ I prefer to root in treepots because they are tall enough to bury the bulk of the cutting while easily keeping the bottom of the cutting out of the perched water table, which is a location rot can happen if the cutting is too low in the pot.

Picture Credit: AscPete
IMG_2092.jpeg


▪️ I also prefer treepots because you do not need to tease out or score the roots before up-potting even when very rootbound. If rooting in a normal pot, gently tease the roots out at the bottom when up-potting for the first time so that they grow out and not continue to circle in the same pattern which will affect growth.

▪️ You will know your cutting has rooted in an opaque container based on the amount of top growth. An unrooted cutting can have a little leaf growth, but it will be minor in comparison to a rooted cutting and will start to fail if the cutting has not rooted. So if it is actively growing, it has rooted.
 
Last edited:
ROOTING METHOD TIPS

▪️ The direct plant/pot method is what I recommend for those newer to rooting and seems to have the least amount of issues for the majority of people.

▪️ I do not recommend Fig Pops for first time rooters as it involves some know-how for handling and watering them. It can be a simple method for those who have good technique. But, it is not my favorite method personally and often fails at the up-potting stage for those new to rooting. I still remember as a newbie trying this method, accidentally grabbing a fig pop wrong that was falling down and feeling the roots just rip right off all down the length of the cutting. This is one reason why I prefer pots, they stand upright on their own, you can grab them without worrying about ripping roots, and you can leave a rooted cutting in them for a long time until you are ready to up-pot it.

Make sure you hold fig pops properly, don’t pick them up by the cutting itself. Use a toothpick to poke holes all over the bag and stick them for a quick moment in water for watering them. Roots can stick to the bag when you go to up-pot them. Giving them a little water can help lubricate the sides so they come out easier. Only up-pot when fully rootbound.

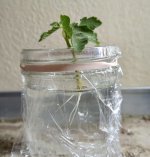
▪️ Water rooting is another method used by some. It seems to be a case where you either love it or hate it. It can be a slower method of rooting and can require some work with regular water changes. Care needs to be taken with potting them as well, using wetter mediums at first and delicately placing the mix around the roots. I have found it to work best on non-dormant cuttings and may be a good method for green-new growth cuttings.

I prefer to have the bottoms of the cuttings barely touching the water, while keeping the rest of the cutting in a humid environment. But others will submerge the entire bottoms or even the majority of the cutting in water. Others will use hydroponic type situations, or bubblers to help keep cuttings healthy while being in the water. This is not a favorite rooting method for me, but it can definitely have a place in certain situations.


Water Rooting A Non-Dormant Tip Cutting
IMG_1559.jpeg

▪️ Climate can have a bearing on the method you choose. For example, the amount of natural humidity in your environment affects how much you need to worry about moisture control and cutting desiccation. Someone in the hot, humid south may have problems with things like Parafilm causing rot, whereas someone in a drier climate may lose cuttings to desiccation if they do not use Parafilm, or something else to control moisture loss. Other places are in between and you will need to see what works best for you.

This also can affect rooting mix choices as well. Something very aerated like bark, gritty mixes, or coarse grain diotamaeous earth can work great in humid conditions but can be hard to keep hydrated enough in dry climates. You may choose to avoid things like bark for this reason and/or bag your pots when rooting to maintain sufficient moisture to stimulate rooting.

▪️ I do not recommend humidity bins for rooting fig cuttings. They tend to trap in too much moisture and do not allow enough air flow. This encourages a lot of issue with mold for me. Also, there is quite a bit of acclimation needed when transferring out of the bin. I feel they are more hassle than they are worth.

▪️ My environment requires something for moisture retention in a cutting for it to root before desiccation, or drying out, of the cutting starts. Parafilm or BuddyTape can be used for this by tightly wrapping and stretching the material as you wrap over any part of the cutting that is exposed to air. Do not put it below the soil line because water can be wicked up underneath the wrap.

However, I have found that Parafilm/BuddyTape can require a lot of maintenance when used indoors for preventing mold or rot from developing on the cutting underneath it. I lost a few cuttings in the beginning from top down rot that started under the wrap. And some cuttings after that required monitoring for signs of rot starting, then gently prying off the wrap in those areas and treating with hydrogen peroxide.

So, I now prefer to minimize how much of the cutting is exposed at the top, to bury the majority of it, and to seal cut ends with something less permeable, such as paint or pruning sealer. I have had fewer issues with this method and it is a set it and forget it type setup.

▪️ Some cuttings can be stubborn to get going for rooting. 8 months was the longest it took one cutting to root for me. If after 8-12 weeks you are not seeing any signs of growth, you can very gently remove it from the rooting mix to check for rot if you desire to. Remove carefully in case roots have started to form, you don’t want to rip them off. If there are no roots and there is no rot, sometimes making a fresh cut at the bottom and soaking in water for a time can help to stimulate it. Trying a prerooting method can also be helpful. Or, this is where you might want to bring out the liquid rooting hormone.

It should be noted that some cuttings are just duds and won’t root through no fault of anyone. Grafting can be considered as an alternative if the cutting is still healthy as well.
 
Last edited:
ROOTING MIX TIPS

▪️ I do not use any organic matter in my rooting mixes. Organic matter is prone to composting action and will want to break down. This encourages anaerobic bacteria to develop in your rooting medium which can cause your cutting to rot. Organic matter can also harbor insect eggs and seems to bring on fungus gnats in indoor rooting setups. I save the organic matter for later after rooting has been successful and once outdoors.

▪️ If you are into pH, 5.0 to 6.5 has been recommended as being better for rooting mixes. It is not something I typically worry about myself, but both peat and coco coir mixes typically happen to fall nicely into this range. This range reportedly helps to prevent mold growth. But be aware that other ingredients can raise pH such as perlite and certain mineral components.

▪️ Aeration in rooting mixes is very important for rooting success and to prevent rot. There can be a fine balance between having too much aeration and not enough depending on how you grow and your climate. If you are someone who tends to overwater or you live in a very humid environment, the more aeration the better. Aerating materials allow you to have more water present without worry. The less aerating materials you have in your mix, the more you need to worry about how much water you are using because water fills in the few air gaps available in a fine mix. I prefer medium sized aerating materials for a rooting mix, larger sizes for potting mix. Smaller sized particles are not suitable for cuttings and are for seed starting instead. Aeration is your friend for rooting and growing and is a must for root health.

More detail on rooting mix formulation linked here.
 
Last edited:
WATERING TIPS

▪️ Water or moisture is also important for rooting success. Moisture is what will stimulate root formation on your cutting. So, it is important that your rooting mix is not too dry. It should remain damp, but not soaking wet.

▪️ You can easily tell if a pot needs water by feeling the weight of it. A watered pot is much heavier and a pot needing water is much lighter. The difference should be perceptible. If you cannot feel a difference, then it probably does not need water yet.

However, if you struggle to feel a difference regardless, then get the starting weight of your pot right before you bag it, write it down somewhere, such as on your pot. Weigh your pots before watering to see how much the weight has changed. Add water to bring it back to weight.

Whether the pot is bagged and how rooted a cutting is will determine how often to water. For an unbagged pot, it is good to check for water about once a week starting out. Very aerated mixes will need water sooner, less aerated mixes will need water less frequently.

Let the plant use what is there before watering again, and make sure something is there for the plant to use.

(Unrooted cuttings should be able to go weeks between waterings when the pot is bagged unless you are using an extremely aerated mix.)

▪️ After about 8 weeks from initial rooting, (not potting,) the young plant should start to stabilize and become less sensitive to watering issues. After about the 3 month mark, I’m usually able to water more like my other plants without as much worry of overwatering. (This is just an average, the amount of individual growth & development affects this.)
 
Last edited:
ROOTING MIXES IN DETAIL

Having a good balance between aeration and moisture is important for rooting success. Air pockets keep roots healthy and moisture stimulates rooting.

Often growers propagate in a heavy mix or a fine mix that retains a lot of water. This can lack sufficient oxygen though which inhibits rooting. Water loss can also be slower during winter or in humid climates, which can prolong a reduced oxygen environment, leading to suffocation and anaerobic microbes taking over.

Using a substrate with a higher amount of perlite or other aerating materials really helps to prevent cutting death and keeps roots healthy. It’s also easier to work with as you don’t have to worry as much about having precise & measured watering.


Standard Mixes
A good starting ratio is 50/50 of peat to aerating materials or 60/40 coco coir to aerating materials, and should work in most environments. (Coco coir holds less water than peat, so a lower ratio of aerating materials can be used with it for a standard mix. Premade coco coir & perlite mixes are often in the 70/30 ratio, but can vary.)

Gritty Mixes
However, that ratio can change as much as up to about 10-20% peat or coco coir to 80-90% aerating IMG_2127.jpegmaterials to make a very gritty & aerating mix. It is recommended to keep perlite to about 40% or less in such a mix and to use other aerating components that can retain some water. This is so the mix does not dry out too quickly as cuttings require consistent moisture to initiate rooting. I personally would keep perlite down to 15% or less.
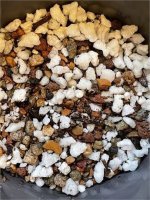
Why use a gritty mix to root? A gritty mix can be fantastic for very humid environments, if you like to water frequently, even every day, or if you have a cutting that you are worried will rot.


Picture Credit: PacNorWeck
One of the main detractors from using a very high ratio gritty mix is that the particles do not clump or hold together on their own. So, one needs to be very careful at up-potting that there is a significant amount of roots to hold everything together when the plant is removed from the pot. Even then, particles will fall out from the root area. This is problematic if the roots are too tender because they can be torn off the cutting. So, it is typically recommended to be very rootbound before the first up-pot using these.

*Note that gritty mixes require more frequent watering, and so if using, check your mix after 2 weeks (or sooner if extremely gritty) instead of the initial 4 weeks when bagged.


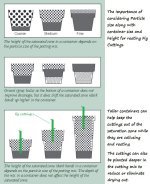
Particle SizeIMG_1955.jpegIMG_2092.jpeg
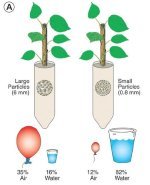
The other aspect that needs to be considered is particle size. For regular potting mix, I prefer really coarse materials so that they last a longer time. However, It can be challenging to use really large sized particles in rooting mix because the pots are usually smaller. I still err towards the larger size when possible as they usually work with my choice of materials in 4x9 treepots.
Picture Credit: AscPete
The finer the material used, the smaller the air pockets, and more water is typically retained with these. Larger particles create larger air pockets and so less water is retained. Larger particles throughout the mix also lowers the saturated zone in a container. Finer particles raises it. This applies even to the moisture retaining component. Think of fine coco coir compared to coco coir chunks. One will retain more water than the other and one will allow for larger pockets of oxygen.

Medium particle size is probably the best to aim for when rooting cuttings. Small, fine particles are best suited to seed starting and are not for cuttings. Too large of particles may not hold enough water to stimulate rooting. Sometimes a combination of fine & coarser materials is necessary due to availability and can be used together to balance a mix out.


Custom Mixes
Moisture Retaining Materials:
Coco coir
Sphagnum peat moss

Aerating materials:
Pumice, my favorite over perlite!
Coarse Perlite
Coarse Vermiculite*
Calcined Clay*
Coarse Granular Zeolite*
Coarse Grain Diatomaceous Earth*, such as OptiSorb sifted
Coarse Sand suitable for gardening, such as washed all-purpose builders sand
Crushed Granite
Expanded Shale
Chunky Coco Coir**
LECA*, #
*Indicates also has some moisture absorption & nutrient retaining ability. However, this is limited & not significant enough to put them in the moisture retention category. Their properties remain highly aerating in general.
** This is one that starts off aerating with some absorption, but will break down over time becoming only moisture retaining. Watch your particle size in relation to your container size.
#These should be hydrated before using so that they do not take moisture out of your rooting mix. Watch the size in relation to your container size.

Ratios:
Standard ratios for rooting mixes are anywhere from 70/30 to 50/50, moisture retaining / aerating.
A good gritty mix ratio is 1:1:1, with 1 part moisture retaining, 1 part aerating no absorption, and 1 part aerating with aborption.
An even heavier gritty mix can be made going up to 20/80, moisture retaining / aerating. (Try to keep perlite at 40% or less for the aerating portion. I recommend 15% or less.)

It is super easy to create your own custom mix to suit your needs and ingredient availability. Just choose your ingredients and your desired ratio based on the properties you would like it to have, and get to mixing!

Incorporating a Premade Mix Into Gritty Mix
Sunshine Mix #4, ProMix HP or BX, or a premade coco coir & perlite mix can be used for a gritty mix. This can be about a 1:1, 1:2 or 1:3 ratio when using these, depending on how gritty you want it.

Example, 1 part Sunshine Mix #4 to 1-3 parts other aerating materials. Because these already have perlite, another moisture absorbing aerating choice may be better, such as vermiculite or calcined clay.
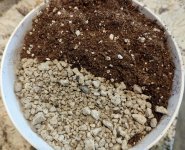
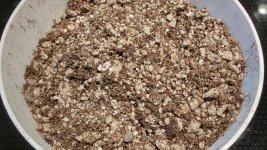
IMG_0142.jpegIMG_0143.jpeg


(From AscPete in his simplified rooting mix post using calcined clay.)
Potting Medium to Additional Aeration Ratios:
Sunshine Mix #4, 65-70% Peat start amt. Add in 1:1 ratio, 33-35% Peat end amt.
Sunshine Mix #4, 65-70% Peat start amt. Add in 1:2 ratio, 33-24% Peat end amt.
PRO-MIX BX, 75-85% Peat start amt. Add in 1:2 ratio, 25-28% Peat end amt.
PRO-MIX HP, 65-75% Peat start amt. Add in 1:1 ratio, 33-38% Peat end amt.
Coco Coir, 100% Coir. 1:2 ratio, 34% Coir
Peat Moss, 100% Peat. 1:2 ratio, 34% Peat
50/50 Peat & Perlite, 50% Peat. 1:2 ratio, 17% Peat
Organic Matter
I do not use organic material in my rooting mixes, such as compost or manures, as they encourage anaerobic bacterial growth in order to break down the organic matter, and can have insect eggs. This is not the environment we want for rooting. I save the organics for after rooting, once they are outside.

I do not recommend using wood based materials in rooting or potting mix as they are meant to break down and do not have a long life. I strongly feel that you do not want decomposing matter as the base around roots.


My Favorite Rooting Mixes
My favorite mix is 65/35 coco coir & perlite when buying premade. Otherwise, I like using pumice instead of perlite when making my own mix, and usually do about a 50/50 peat to pumice mix. Another favorite is 1 part peat, 1 part pumice, 1 part coarse vermiculite.
 
Last edited:
How I Control Fungus Gnats
  1. I do not use organic matter in my rooting mix. This alone cuts down on the bulk of the problem. I also use as “fresh” of peat or coco coir as possible, meaning I try to get newer bags and not bags that have been sitting in a yard for a length of time.
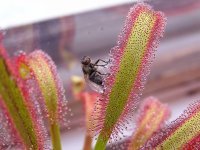
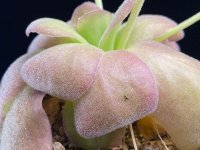
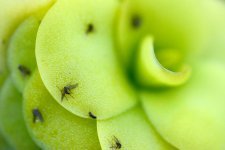
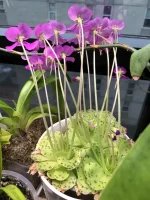
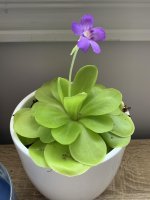
  2. I have a few carnivorous plants in my rooting setup. I prefer Pinguiculas, aka Butterworts. They are IMG_2130.jpegIMG_2131.jpegeasy to get online and easy to take care of.

3. Little bug zappers can also be placed in your rooting setup.
OPTIONAL: Some also will use a fan to create a breeze over their rooting setup. This makes it more challenging for fungus gnats to fly over the area. Just be careful it does not lower the temperature too much.

With the above steps, I have never needed to use any pesticides, mosquito bits, or Gnatrol even with hundreds of cuttings rooting at once.

Fungus gnats are drawn to decomposing organic matter and are part of the cycle for promoting the fungus that breaks it down and that they eat. So, keeping things aerated, and not using the organic materials they can consume is your best bet. Using LABS can also help to keep things aerobic and fight the fungus that draws them.


Pinguiculas & Drosera (Sundews)
IMG_2132.webpIMG_2129.jpegIMG_2135.jpeg
 
Last edited:
SOURCES
(These are not affiliate links, I’m not that social. 🙂)

My favorite paint pens: Edding 751 White
Amazon.com: Edding 751 paint marker - white - 1 pen - round tip 1-2 mm - for labeling metal, glass, rock or plastic - heat-resistant, permanent and waterproof : Arts, Crafts & Sewing

My favorite treepots: Stuewe & Sons 4x9.5 Mini Treepot
Mini-Treepots™ & Trays Kit - TRAY6 WITH TP49 KIT - Stuewe & Sons
Also available here: https://www.greenhousemegastore.com/products/treepots

Produce bags: From your grocery store or a roll like these from Amazon
Amazon.com: 12" X 16" Plastic Produce Bag on a Roll, Bread and Grocery Clear Bag, 350 Bags/Roll : Industrial & Scientific

Coarse granular zeolite: KMI Zeolite is sometimes available on Amazon. Other brands are also available both on Amazon & Home Depot for delivery. **Look at the picture of the 4x8 size in the link, that is what you are going for with potting mixes. 8x14 is also acceptable for rooting & potting mixes.
https://www.kmizeolite.com/shop/kmi-zeolite-10

Calcined clay: Turface All Sport (not Pro,) or MVP, or EP Minerals Safe T Sorb.
Turface MVP Infield Conditioner 50 lb. | SiteOne
EP Minerals 33 lb. Safe T Sorb Oil Absorbent at Tractor Supply Co.

Coarse granular diatomaceous earth: OptiSorb, needs to be sifted before use and will eventually break down. (Do not use FloorDri which is too fine.) Often available locally at auto part stores.
OptiSorb premium diatomaceous earth (DE) granular oil absorbent | EP Minerals
OptiSorb Oil Absorbent 8925 | O'Reilly Auto Parts

* Calcined clay and coarse grain DE can often be found at Tractor Supply or auto part stores and are easier to pick up locally than to order online.

Super coarse or coarse vermiculite
https://www.greenhousemegastore.com/products/vermiculite
AM Leonard also sells one but it’s not my favorite for shape, wait until a free shipping promo to order.

Coarse perlite:
https://www.greenhousemegastore.com/products/perlite
Amazon.com : Mother Earth HGC713310 Perlite & Coarse Perlite #3, 4 cu ft : Growing Media : Patio, Lawn & Garden
AM Leonard also sells one, I recommend to wait for a free shipping promotion to order from here.

My favorite worm castings: SD Microbes
BioVast VermiCompost 100% Organic Soil Conditioner – SD Microbes

Seaweed fertilizer: Use one with ascophyllum nodosum which supposedly helps stimulate rooting. (Do not use one with fish for indoors.) There are many brands, this is just one.
Amazon.com : Neptune's Harvest Seaweed Fertilizer 0-0-1 (36 Ounce) : Fertilizers : Patio, Lawn & Garden

My current favorite coco coir & perlite mix available on Amazon: Pioneers Harvest
Amazon.com : Pioneers Harvest 65/35 Coco Perlite Blend, Potting Soil Grow Media, All-Natural : Patio, Lawn & Garden
* Coco coir and perlite mixes can be found on Amazon, but are often cheaper at local hydroponic stores.

Pumice and sand are best sourced locally
; pumice from garden nurseries or hydroponics stores, coarse all purpose builders sand from Home Depot or Lowes.

Sunshine Mix #4 is often at Home Depot or Lowes, depending on your location. ProMix HP or BX can also be used, but typically has less perlite in it I believe. ProMix is not often available in my area, but it is my understanding that Ace Hardware often has it
 
Last edited:
Closing Comments

I feel like I have poured my brain out into type written form with this guide, and yet I am certain I have missed something. That’s okay, it leaves room for someone else to tell you all about those vitally missed points in their own thread which keeps the forum world spinning.

The earth and everything in it is made for growing. Nature just has a way of taking care of everything one way or another. And that is certainly the case with growing figs, they just want to grow. So, there can be many right answers to questions on growing them. Much is subjective, and that is certainly what this guide is— my opinion, nothing more, and it should be treated as such.

I am a lazy gardener. I procrastinate and take the easy way whenever I can. I know for a fact there are people with way better growing technique than I implement. I also know for a fact there are people with way worse growing technique! 😏

Somehow though, I have ended up with a ton of trees in spite of me and my lollygagging ways. I have gained quite a bit of knowledge in this time. I hope this adequately shares it with you to help facilitate your own fig growing journey.

But let’s be real. The majority will retain like 1% of this and will learn best by doing. So get out there and do! (And then write your own guide for the next generation of growers. 🙂)


Credit where credit is due: My most successful rooting experiments were heavily inspired by AZfig, MJFIGS, & AscPete on OF and there are bits and pieces from each of them in this guide. I thank them for what they have shared over the years.

Also, not all pictures are mine and some were gathered through internet searches. I tried to give credit when the source was known.
 
Last edited:
Back
Top