Ben
Member
Hi Everyone,
I was also one of the lucky new forum members who received a batch of cuttings to propagate. Thanks @TorontoJoe @Figless and everyone else involved in this program!
I currently have 2 fig trees growing in my orchard that my mom propagated from cuttings from her tree in 2023 and 2024. They're both off of the same tree, so I only had 1 variety until this winter, which she thought was labeled as a Brown Turkey when she bought it 20 years ago.
I really got into propagation this winter and bought a batch off of cheap cuttings on figbid back in January. I had a really high success rate with those cuttings. I didn't document anything that I did with them, but I'm going to try to follow the exact same process and document it here. Hopefully this will help someone else who is just starting out. I still consider myself a beginner on this and if any of the pros have any suggestions for me or for anyone reading this in the future, please feel free to speak up.
Here was my process:
- When the cuttings arrived, unpackage them, label them if needed, and put them into a 0.3% Hydrogen Peroxide bath. I used a bottle of regular 3% Hydrogen Peroxide and diluted it 10:1 with water. I let the cuttings soak for about 10 minutes and then took them out to air dry.
- I received 13 cuttings. I had 8 32oz clear plastic cups available. I drilled drain holes in the bottom of them. I used 1 gallon nursery pots for the additional 5 cuttings.
- I used a mix of ~50:50 bagged organic potting mix (from Lowes) and perlite. I know people say that coco coir is better to use, but I couldn't seem to find it locally. I added water a little bit at a time and mixed as I went. I stopped adding water when everything felt moist, but when I was still unable to squeeze a drop of water out of it when squeezing as hard as I could.
- On most of the cuttings, I trimmed 1/4" off of the bottom of the cutting to expose green wood. I only did this on the cuttings that had plenty of extra wood below the lowest nodes. On the ones where the nodes were right at the bottom of the cutting, I didn't trim them and left them whole.
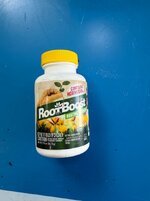
- I dipped the bottom of the cuttings in rooting hormone that I bought on Amazon. I think it was the cheapest bottle that I could find on there. I tapped the cutting on the side of the cup the rooting hormone was in to knock off any excess powder.
- I prefilled the bottoms of the pots with about 1.5"-2" of my mix and placed the cutting on top of that. I then held the cutting upright while I loosely filled the mix around it. I did it this way to try to avoid rubbing off the rooting hormone when shoving the cutting down into the mix.
- Unfortunately I don't have any parafilm, so I put as many pots as would fit into a covered storage container. I figured that this would help prevent the moisture loss that the parafilm is supposed to help with. For the ones that wouldn't fit into the storage container, I loosely tented the gallon ziploc bag that the cutting had originally come in over the cutting and pot, again hoping to prevent them from drying out.
- I placed them all on my grow rack that I have in my basement. I have the lights on below them, which warms them up to about 77-78F. They don't have light directly on them, but there's a decent amount of ambient light in the room. They don't need the light at this point.
Attachments
-
 the assortment.jpg214.8 KB · Views: 29
 -
 set up.jpg144.3 KB · Views: 16
 -
 in the bin.jpg147.5 KB · Views: 14
 -
 potted.jpg218.9 KB · Views: 12
 -
 rooting cup.jpg101.4 KB · Views: 12
 -
 in the pot.jpg135.5 KB · Views: 12
 -
 potting.jpg107.8 KB · Views: 12
 -
 trimmed.jpg59.4 KB · Views: 12
 -
 hormone.jpg65.7 KB · Views: 11
 -
 h2o2.jpg133.1 KB · Views: 23
 -
 perlite.jpg139.5 KB · Views: 15
 -
 pot prep.jpg106.3 KB · Views: 12
 -
 mix.jpg148.1 KB · Views: 12
 -
 mixing.jpg288.1 KB · Views: 12
")


